How To Install Carpet Tiles Without Glue


Related Product: Carpet Tiles Modular Squares 3/4 Inch x 1x1 Ft.
How to Install Carpet Tiles Without Glue
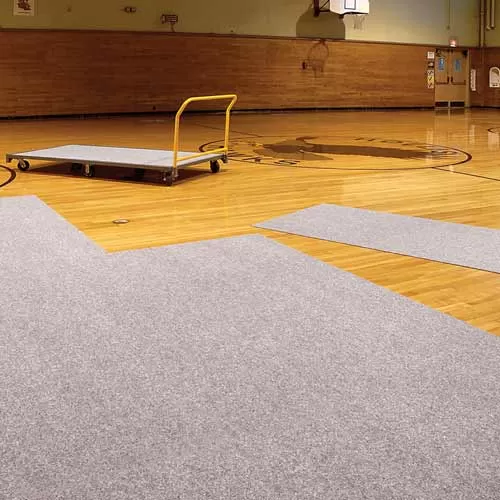
When you use the loose lay installation method, you’ll put your carpet tiles directly on top of a flat, hard floor. You can put them on concrete, wood, and more, and there’s no need to secure them to that subfloor.This type of installation requires no glue and offers several benefits. When the tiles are dry laid, you can remove them and reinstall them as needed, such as if a basement floods or you decide to repurpose and redesign the space.
Dry laying your floor also means that you can replace worn or damaged tiles as needed. This option can save you the time and cost of replacing your entire floor, extending your floor’s longevity.
When you’re working with interlocking tiles that have been dry laid, you can add on more tiles and expand the flooring as needed in the future. You’ll also save the time and expense of hiring a professional installer.
Thanks to its many benefits, dry laying tiles is a popular choice.
Choose Your Tiles Carefully
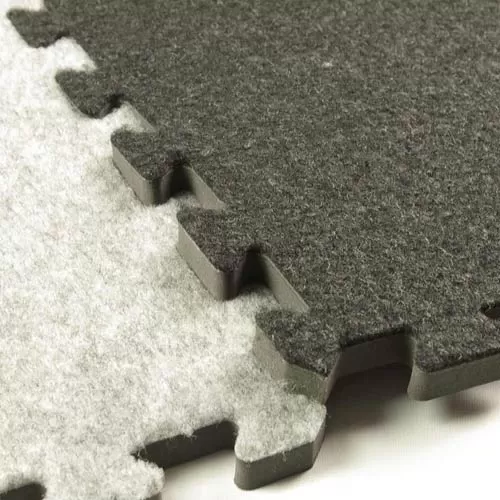
 At Greatmats, we offer many different carpet tiles that can be installed without glue. These tiles feature a variety of designs, including interlocking puzzle edge tiles and tiles with raised bases that create a floating, raised installation.
It’s important to choose the tiles that will work best for your needs. Some carpet tiles are designed specifically for adhesive installations, so be sure to verify that the tiles you choose are suitable for a dry laid installation.
If you’ll be installing tiles in an area where they’ll be exposed to significant moisture or floods, like basements, then it’s often best to choose a raised base design. This base keeps the carpeted surface up and off of the floor, allowing air and moisture to freely circulate below for faster drying.
You’ll also want to consider other qualities, like the warmth and cushion that a tile offers, how easily it can be cleaned, how durable it is, and whether it can support rolled carts and other types of traffic. If you’re installing the tiles in a commercial space, be sure to choose a tile that’s durable and rated for commercial use.
Some tiles are available with UV stabilizers and fungus inhibitors, which can be very important, depending on where you’ll be installing those tiles. You’ll also want to consider any warranty available for the product that you’re choosing.
Refer to the Installation Instructions
Once you’ve chosen a tile, refer to its installation instructions. If you’re working with a tile that has a patterned surface, you’ll need to be sure to orient each tile appropriately to maintain that pattern.
The following instructions work for most tiles, but the instructions that come with your flooring can provide extra guidance specific to that product, especially when it comes to how the tiles connect together.
For Modular Carpet Tiles, refer to the video: How To Install Modular Carpet Tiles Over Concrete
For Interlocking Carpet Tiles, refer to the video: How to Install Royal Interlocking Carpet Tiles
Plan Your Installation
Before you begin the installation, plan out how and where you’ll be laying the tiles. If border pieces are available, plan out where those pieces will go.
This planning process is particularly important if you’re laying the tiles to create a pattern. It can be helpful to position the tiles where they need to go so you can spot pattern irregularities or challenges early on.
Be sure to also spend time preparing your site. Sweep or mop the subfloor so that it’s clean and free of debris before you start.
Start in a Corner
When you start installing snap together carpet tiles, begin in one corner and work your way out. Install one tile at a time, connecting it to the previous tile by fitting the connecting edges together.
You may need to trim the tiles to fit an area, and that’s easy to do with most carpet tiles. You can use a straight edge and a razor to trim the tiles to fit.
Before you cut a tile, make sure that it’s oriented so that it will connect correctly to the tiles that you’ve already installed. Some tiles feature universal interlocks, which mean you can orient them in any way and connect them to tiles, while others feature designs that allow only certain sides of the tile to connect to certain sides of your other tiles.
If you’re performing an island installation, you can add edge pieces to the exterior tile edges once you’ve completed the installation. In the case of a wall-to-wall installation, you can also add these pieces on, though you may need to trim certain tiles to fit the room.
Dry laying tiles saves you time and money, since there’s generally no need for an underlayment or a professional installer. When you carefully plan your project, you can often complete a successful installation entirely on your own.