Cutting Rubber Pavers: A How to Guide for Outdoor Rubber Pavers

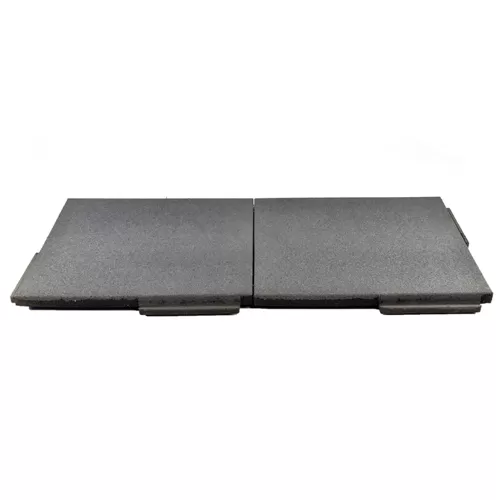


Related Product: Sterling Roof Top Tile Solid Colors 2 Inch x 2x2 Ft.
You'll see rubber paving tiles used in a variety of ways, including:
- Outdoor walkways
- Barn aisleways
- Horse wash stallsTunnels
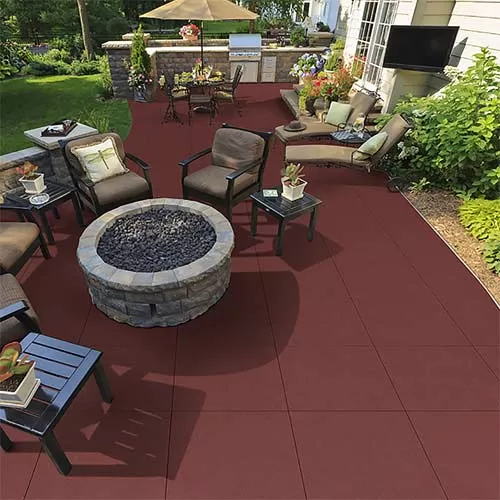
- Patios
- And more
While many of these tiles are used in equestrian facilities, they can serve as outdoor rubber flooring in other areas, too, including around homes, commercial spaces, and other areas where you want a beautiful surface that's also safe and comfortable underfoot.
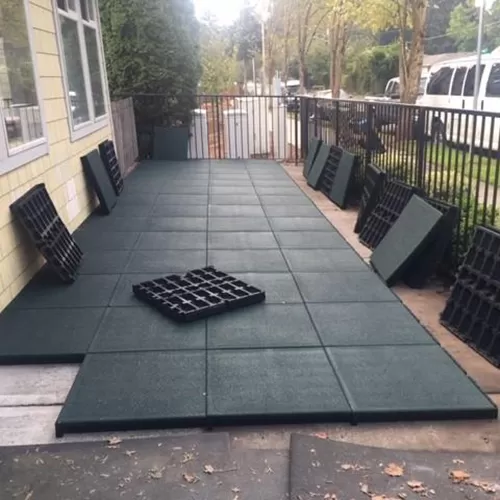
Installing Rubber Paving Tiles
Installing outdoor pavers is relatively simple. The pavers fit together to form a beautiful pattern, and with a careful installation the resulting floor will look professional and attractive.When you install the rubber paving tiles, you'll probably find yourself in a position of needing to cut the pavers. It's the same situation you would face if you used traditional brick; because many pavers are offset, you'll need to cut the pavers of at least every other line that you install in order to have a straight edge on the sides of your installation. Even pavers that align nice and square with each other may need to be trimmed to fit your space.
Cutting rubber pavers isn't terribly difficult as long as you have the right tools and know the right method to cut these tiles to fit.
Tools For Cutting Rubber Pavers
Before beginning your installation, gather all of the items that you will need to cut rubber paving tiles- Measuring tape
- Pen
- 2x4 piece of scrap wood
- Straight edge
- Utility knife with sharp blades
- Extra blades (depending on the number of pavers you'll need to cut)
How to Cut Rubber Pavers
To cut rubber pavers, start by measuring your installation space and deciding where you need to make a cut. Using your straight edge and pen, mark the line of the cut that you need to make on the paver.Next, place your spare 2x4 piece of wood underneath the paver. You should position the wood so that it follows just underneath the line to be cut, and so one side of the paver hangs off of the wood. The paver's weight will help to open the cut you make so that you can work your way through the entire thickness of the paver. Keep in mind the size, weight and thickness of your paver will affect how much it will assist you in this process.
Line the straight edge up with the cutting line. This will help to guide your cut so that every cut you make stays straight.
Using your utility knife, begin to make a series of shallow scores along the cut line. You'll need to put some pressure onto the knife, but don't press too firmly - this is a gradual process. As you cut, the paver's weight will pull open the cut line, and you can progress further with each cut. This keeps the friction off of your blade.
Continue this process until you work your way through the entire paver. As you cut, make sure to focus on cutting straight down - cuts made on an angle will give the paver's edge a slant, and it won't fit tightly up against the other pavers or walls.
If your knife starts to shred or catch on the paver, then it's time to change your blade to a sharper one. You may need to change your blade repeatedly during the process, especially for larger installations.
How to Cut Rubber Pavers for Curved Areas
To make curved cuts, such as if you're installing the pavers around a pole, it's best to use a cardboard template. Cut out the cardboard to reflect the cut that you need to make on the paver, and then use the cardboard as a guide. Place the paver on a piece of wood for support, and make repeated, shallow scores in the paver.Additional Paver Installation Tips
It's best to carefully plan out your installation before you start cutting and installing rubber pavers. Map and measure out the exact space where the pavers are to be installed, and double-check to make sure that you have enough pavers to complete the project.You should give the rubber pavers and the adhesive (if necessary) at least 48 hours to acclimate to the temperature and environment. Remove any shrinkwrap or packaging so air can freely circulate around the pavers. This will help to keep the pavers from expanding or shrinking during your installation.
When you're ready to begin your installation, be sure to clean the base surface thoroughly. Remove any dust or debris, and make sure that the service is level. You'll also need to make sure that there's no grease, oil, wax, sealers, and other substances.
Pavers can be both dry laid and installed with adhesive, but the right method will depend on the type of pavers that you're using. Thinner pavers must be laid with adhesive, while thicker pavers can be installed using either method. Be sure to refer to the specifications and installation directions for the product that you're working with.
Be sure to invest in reducer strips - especially for thicker pavers - which you will install around the perimeter of your rubber pavers. These strips help to make a smooth transition from the higher pavers onto the lower surrounding surface. They're an important safety addition when your pavers are higher than the surrounding area.
DIY or Professional Outdoor Rubber Installation?
When it comes to cutting rubber pavers and installing them on your own, many people feel that they're up to the task. This can make for a decent DIY project as long as you understand how to cut rubber pavers and are comfortable with the rest of the installation method. However, you can always hire a professional installer to help.Unsure of whether a DIY method or a professional installer is right for you? Consider the following factors:
Scope of your project:
Installing pavers along a small walkway will be a different experience than installing them in an entire barn aisle will be. Think about the scope of the project that you're facing.Your time:
How much time do you have on your hands? How valuable is your time? If you have the time, you could save some money on installation. But if you're pressed for time and can afford it, hiring an installer might be the better option.Dry laid or adhesive installation:
Dry laying pavers makes for a simpler installation than an adhesive method will be.
While not a physically taxing installation, rubber pavers do require some time and patience. However, it's worth it, knowing that your finished flooring will be beautiful, safe, and highly durable.