How to Install Outdoor Flooring over Gravel, Grass or Dirt
Related Product: Portable Outdoor Tent Tile 3/4 Inch x 1x1 Ft.
The below guide on how to install outdoor tile will help you to get started.
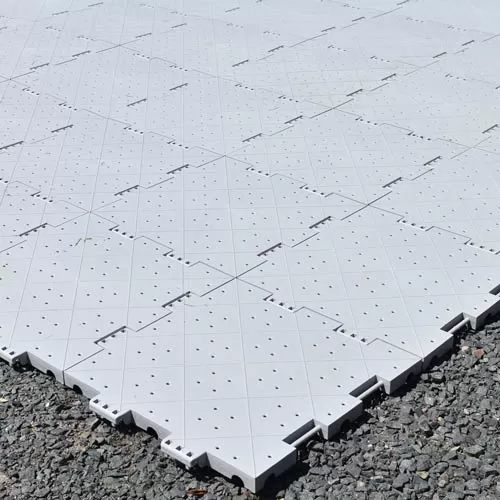
How to install interlocking patio tiles over gravel, grass, or dirt
Greatmats portable outdoor tiles are a versatile option suitable for many uses. They can serve as commercial tent flooring, temporary sidewalks, dance floors, portable outdoor flooring, and more. Because these tiles are designed to contour to the landscape, you can install this outdoor flooring over gravel, grass, dirt, and more.While no tools are necessary for the installation, understanding just how to install outdoor tiles will make the process smoother. Having a piece of plywood available can make it easier to connect the tiles together, especially if you’re working on an uneven or soft surface.
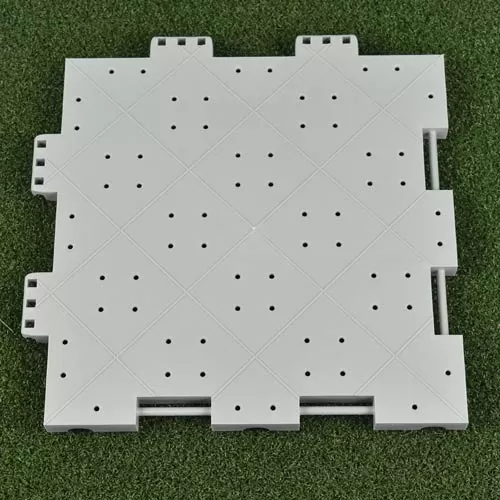
These tiles come in pre-assembled 3x3 tile sections, saving you some legwork and minimizing the number of pieces you need to put together. Because each tile weighs just 0.81 pounds, a single person can easily carry one or more of these 9-tile sections.
To start your installation, begin in a corner of the area that you want to cover. Position your tile panel so that the rod connectors face outward. Position your next sheet of tiles so that it faces the same direction and place the tab edges of this new sheet over the rod connectors on the tiles that you’ve already laid.
Next, step on each of the tabs until they snap over the rods. When the tiles are correctly connected, the interlocking portion won’t be visible, creating a smooth, finished look. Work from that corner out and continue adding tile sections on until you’ve reached your desired floor size.
If you’re working on a soft or uneven surface, you might have some difficulty getting the tabs to snap into place. If this is an issue, slide a sheet of plywood under the area that you’re trying to connect. The plywood will create a firmer base, making it easier to snap the tabs together. You can remove the plywood after connecting the tiles, or you can choose to leave it in place to add stability to the subsurface.
After you’re done using the floor, you can remove the tiles in multiple ways. You can remove those same 3x3 foot sections that you started with, saving you time on your next installation. Alternatively, you can separate out the individual tiles.
Tips for installing temporary outdoor flooring over grass
When you’re laying outdoor floorings over grass, spending a little extra time preparing the site can lead to a better installation result. Thick, tall grass can be uneven and makes for a more difficult installation. If possible, only install outdoor tiles over grass that’s been freshly mowed.Mowing the grass of your installation site helps in multiple ways. If you cut the grass short, your flooring tiles can maintain better contact with the ground for a more stable base and less chance of shifting or of creating uneven areas. Working with mowed grass also helps to prevent the grass from poking up through the flooring seams and drainage holes. When you’re installing portable outdoor flooring over grass for a special event, like a wedding, mowing your grass will give you that clean, finished look that’s pleasing to guests.
Can decking tiles be laid on sand?
In most cases, installing decking tiles over sand isn’t recommended. Sand doesn’t provide a firm base, which can lead to tiles being pushed up and even separating if they’re not firmly connected.But Greatmats' Portable Outdoor Tile is suitable for installation over sand. These tiles snap together very securely and feature drainage holes for use in wet areas. They contour to the landscape and can be installed over sand, gravel, grass, dirt, and pavement.