How to Install Different Types of Indoor Rubber Tiles
How to Install Rubber Tiles
There are three main categories of rubber tiles, and the installation method varies depending on the type of tile you choose. While the instructions below can guide you through the general process, it’s always essential to read the specific installation instructions that come with the tiles you’ve chosen. Manufacturers include detailed specifics on how to install rubber flooring tiles, including suitable subfloor surfaces, adhesive types, and more, which can vary from tile to tile.How to Install Interlocking and Puzzle Rubber Tiles
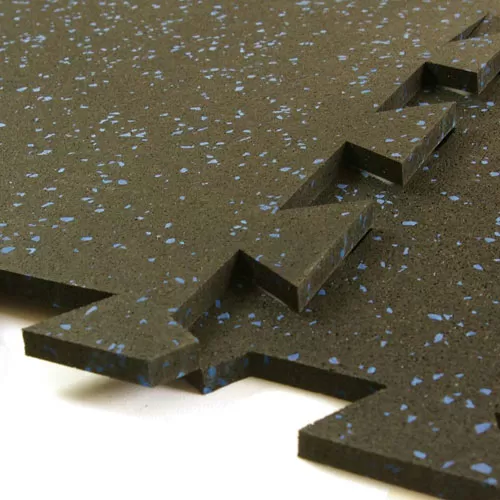
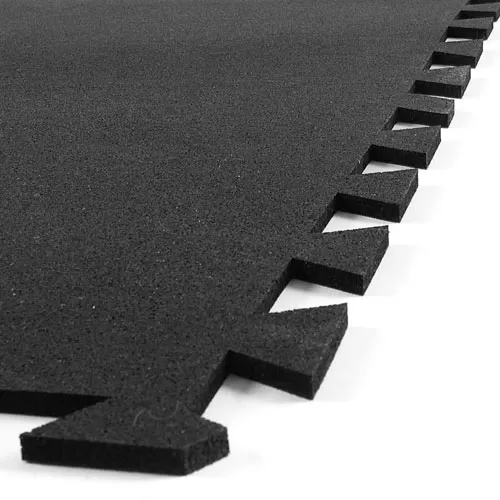
Interlocking and puzzle rubber tiles are designed for an easy, DIY-friendly installation. These tiles feature puzzle-style edges that you can simply press together to connect the tiles. You can loose-lay these tiles without any adhesive, which also allows you to remove them again in the future if needed. The result is a fairly simple and fast installation, though you can choose to glue down the tiles, too. Our Rubber Tile Interlocking and Geneva Rubber Tile are two examples of these puzzle-style tiles.
To install interlocking rubber floor tiles, you will typically start in the middle of your room. You can place the tiles directly on a concrete subfloor or another hard, flat subfloor.
As you install the tiles, press the edges together firmly until they connect. You may find that a rubber mallet helps connect the tiles if the edges are particularly tight. Press firmly on the connecting edges, then align the next tile and repeat the process.
When you reach the walls of the room, you can cut the tiles to fit the space using tools like a straight edge and a sharp utility knife. Measure the distance from the wall to the edge of the last complete tile, then draw a line marking that distance on the tile that you need to cut. Use a straight edge to guide your cut and make repeated, shallow scores until you’ve cut all the way through the tile. By repeating this process, you can create an installation with clean, finished edges that fit up against the walls in your room.
How to Install Hidden Interlock Edge Rubber Tiles
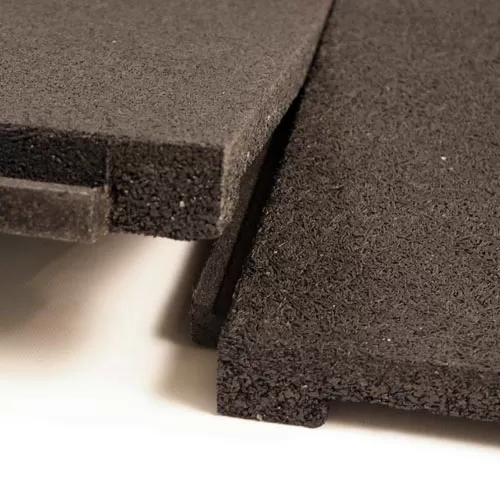
Rubber tiles are also available with hidden interlock edges, which help create a secure connection that won’t pull apart during use. If you’re working with tiles with hidden interlocks, be sure that you carefully review the manufacturer’s instructions on how those interlocks work and how to connect the tiles. For example, the Sterling Athletic Rubber Tile features hidden interlocks that fit together tightly. Once the tiles are connected, they’re nearly seamless.
Sterling provides highly detailed installation instructions for these tiles. Like the puzzle-style tiles, you’ll start in the middle of the room and work your way out. When you connect the tiles, you’ll need to carefully align them and press down on them firmly so the edges interlock.
These tiles can be installed with or without adhesive, and border ramp and corner ramp pieces are available for a clean, finished edge. You can also cut the tiles to fit your space using a sharp utility knife and a straight edge. You’ll need to measure the remaining distance between the last complete tile and the wall. Transfer that measurement to the tile you need to cut, and make repeated, shallow scores with the utility knife until you cut all the way through the tile.
How to Install Straight Edge Rubber Tiles
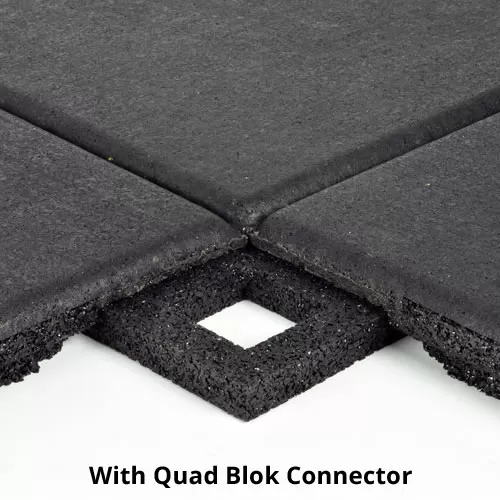
Some straight-edge rubber tiles, like the UltraTile Rubber Weight Floor Tile, feature a Quad Blok installation system. The Quad Blok connector securely holds the tiles together and is paired with adhesive, so they can withstand intense use. Other tiles, like the Straight Edge Rubber Tile, are designed to be installed strictly using adhesive.
Since these systems are so different, it’s essential to review the manufacturer’s installation instructions. When installing tiles with the Quad Blok system, you’ll need to pay close attention to which areas of the Quad Blok and tiles you glue, as well as how you position the Quad Blok against the tiles.
Alternatively, when installing tiles with only adhesive, you’ll need to focus carefully on how to apply the adhesive to get an optimal bond to the floor and the tile. Understanding these key details of how to install rubber floor tiles will help set you up for success.
Keep in mind that installations involving adhesive can be labor- and time-intensive. Instead of performing the installation yourself, you might choose to hire a professional contractor to complete the job.