How To Install Roof Open Drainage Tiles


Related Product: Roof Open Drainage Tile
How to Install Roof Open Drainage Tile Systems
While the exact process of installing open drainage tiles will vary slightly depending on the type of tile you’re using, we’ve created some basic installation instructions based on the AirDrain turf drainage tile. In following this installation process, you will create an exterior nailer board to contain the rooftop system and secure the turf.
- Locate the area where you want to install the system, and make exterior measurements to identify where the system and the exterior nailer board will lie.
- Snap a chalk line to identify where you will place the nailer board, and make sure that your layout is square.
- Install the exterior nailer board so it’s as close to level as possible. A 1”x4” plastic composite board works well as the exterior nailer board. Make sure that you have a square surface to staple the artificial turf to.
- Be sure to either create holes in or leave gaps in the nailer board to allow water to escape. Create these outlets every 3 to 6 inches in the boards.
- Drill ⅜-inch holes or larger into the nailer board to allow air to escape during the compression phase.
- Secure the nailer boards to a rooftop surface using an appropriate adhesive.
- Compress the nailer board with even pressure and allow it to cure.
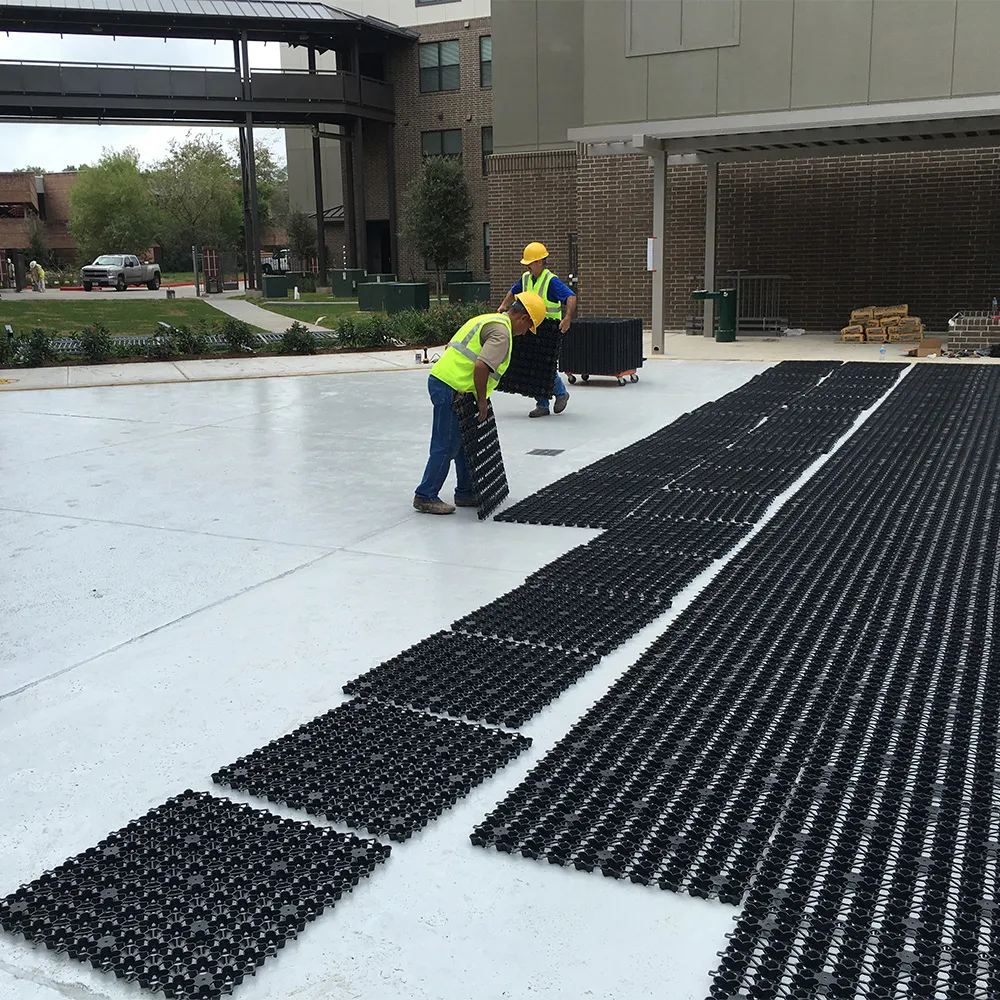
- Begin to install the roof open drainage tiles inside the nailer boards. Position the tiles so that the male and female connectors align. If you’re working with AirDrain turf drainage tiles, the tiles will have a yellow indicator tab on the bottom left corner to guide their orientation.
- Start with one tile in the upper left corner of the grid. Next, install the tile directly to the right.
- Orient the male connectors over the female connectors and drop the second tile down onto the first. The connectors should align and secure the tiles together. There is no pressure needed to connect the tiles.
- Work your way across the top row, then start on the second row; move all the way to the left to place the next tile directly under the first tile that you placed.
- When you place the second tile in the second row, align it so the male connectors on the top of the tile fit over the female connectors on the bottom of the tile above. As you drop the tile into place, the male connectors on the left of the tile should pull it over and align it with the tile to its left.
- Continue the process, working your way all the way across each row before beginning the next row below.
- Repeat the process until you’ve installed all of the interlocking plastic tiles.
If at any point the interlocking tiles don’t align correctly, lift the tile that you’re installing and try to realign the connectors. If you can’t get the connectors to align, check the orientation of the tile; you may need to adjust the tile’s orientation so it aligns correctly.
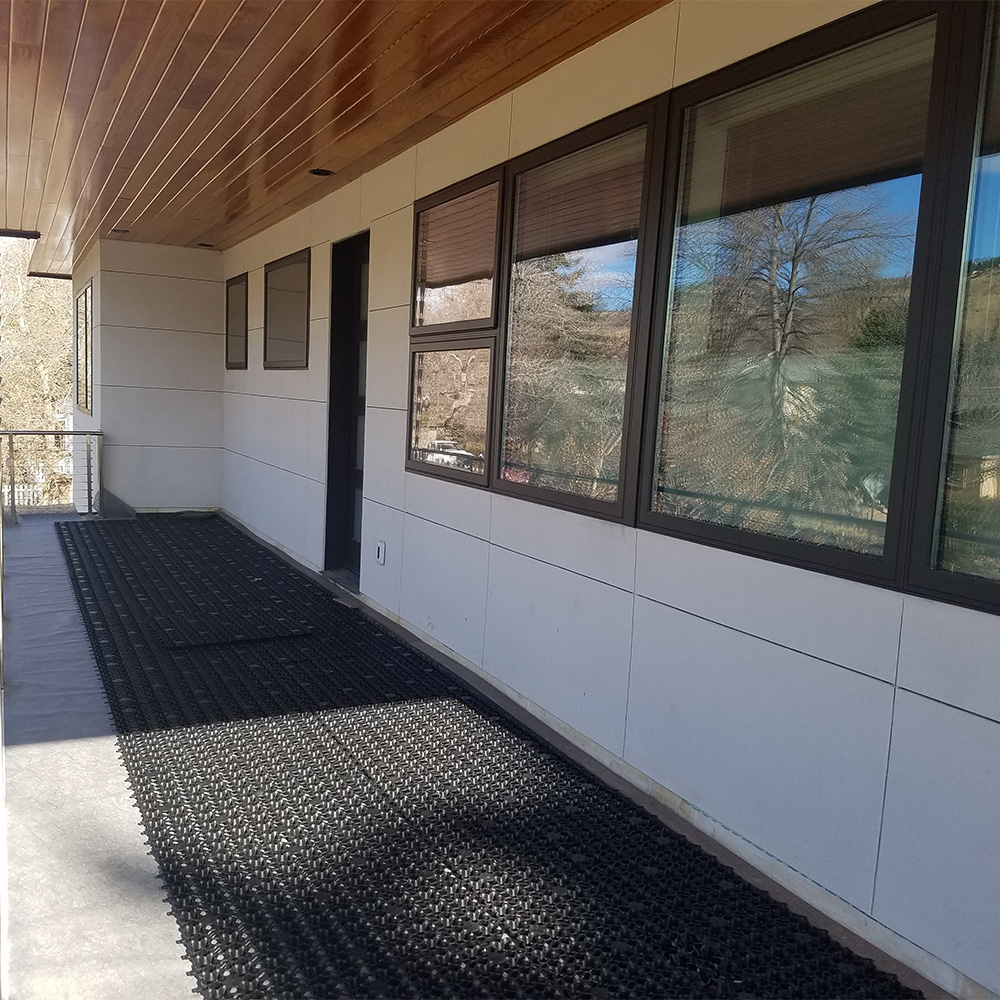
Once the tiles are installed, you can proceed to install your artificial turf on top of the underlay. The tiles will help maximize drainage on the rooftop surface.
How to Choose the Best Roof Open Drainage Tiles
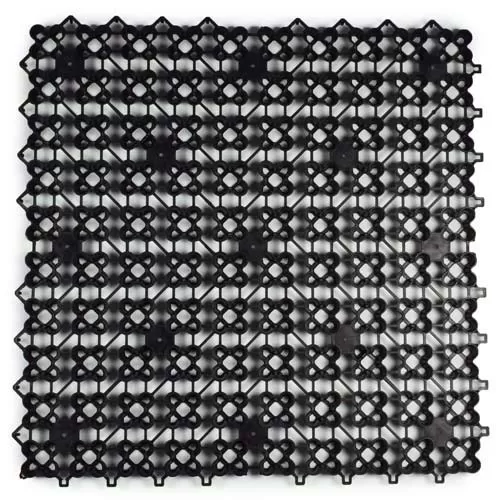
At Greatmats, we’re proud to carry the Roof Open Drainage Tile, a quality tile that can enhance your rooftop installation project. Designed for outdoor use, these tiles create a layer to facilitate vertical and lateral drainage. They require just a 0.25% slope for effective drainage, making them particularly well-suited for rooftops. On a nearly completely flat surface, the tiles can drain 2.85 inches of rainfall per minute, so they can handle large volumes of water and severe weather.
The tiles are designed to expand and contract with temperature changes, preventing them from buckling, so they’re a highly durable choice. Their holding capacity is approximately equal to six inches of gravel, but since the tiles are lightweight, they’re a much more practical solution that’s easier to install.