How to Install Gym Floor Tiles - Based On Material


Related Product: Gym Floor Workout Fitness Tile Pebble 3/4 Inch x 2x2 Ft.
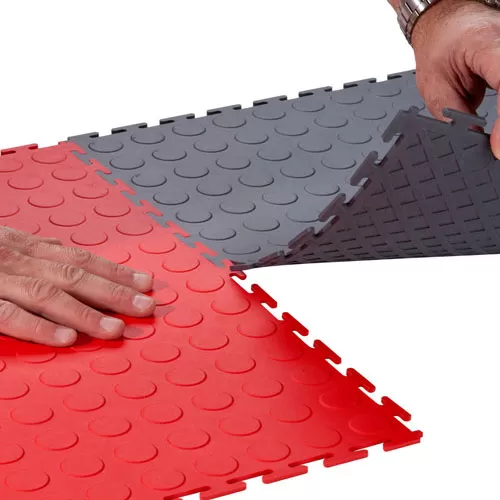
How to Install Interlocking Rubber Gym Flooring Tiles
This is the most common style of gym floor tile. Interlocking rubber floor tiles come in many different thicknesses, but the essential process of installation remains the same: push the squares together like a jigsaw puzzle. Now some gym floor tile interlocking systems vary a bit, as some are directional, some have a universal interlocking system that can connect in any direction, and some have corner and edge tiles that produce a nice, finished straight edge on the perimeter of your gym floor.For directional interlocking systems, you’ll want to make sure that all tiles face in the same direction. To help with this process, many manufacturers will either print or emboss an arrow on the underside of the tiles and put a distinctive interlock on a corner to guide you to the direction each tile should face. Others may come with a diagram and numbered tiles if they are part of a custom-sized kit.
Universal interlocking gym floor tiles can be laid in any direction without issue.
If you’re installing a gym floor interlocking tile with one or more straight edges, those will need to be installed in a specific order. Most commonly, you’ll start in a corner of the room with a corner tile and work your way out in a triangular fashion, starting and finishing each row of the triangle with edge tiles.
If all of the interlocking rubber gym tiles are center tiles - or have interlocks on all four sides - starting in the center of the room and working outward in a circular fashion is common practice. For wall-to-wall installations, the perimeter tiles will need to be cut to fit. This can be done simply using a sharp utility knife, a straight edge, and a 2x4 board that ideally is longer than the tile.
Featured Product: Interlocking Rubber Floor Tiles Color 8 mm x 2x2 Ft.
How to Install Straight-Edged Rubber Gym Flooring Tiles
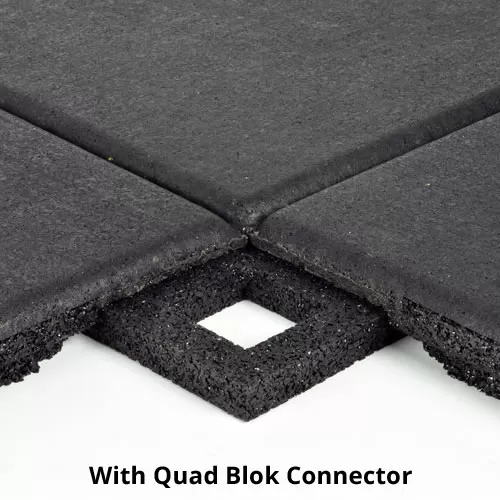
For heavy-duty gym floor tiles with straight edges and a raised base, you’ll want to check with the manufacturer to find out the best method of installation. Some tiles may need to be glued down or glued together while using an interlocking system that is not visible once installed. Others can be pinned together or use what is called a quad block, which allows the tiles to be connected without adhesive by holding the corners of each tile together.If you’re using a basic 4x6 foot stall mat for your gym floor, these are generally loose laid, butting the mats up next to each other.
Featured Product: Action Sport Rubber Gym Tile 10% Color 1 Inch x 2x2 Ft. (Glue Down or Dowel Pin Install)
How to Install Snap-Together PVC Plastic Gym Tiles
One of the lesser-known gym floor tiles is the plastic puzzle tile. These are most commonly made of PVC and used in garage gyms due to their ability to withstand automotive chemicals as well as absorb sound.Installation of the plastic interlocking gym flooring tiles is nearly identical to that of the puzzle-style rubber tiles. Although in some cases, especially when used under vehicles as well as gym equipment, they may need to be glued down to prevent shifting when vehicles are turned on top of them.
Featured Product: StayLock Tile Orange Peel Gray 9/16 Inch x 1x1 Ft.
How to Install Snap-Together Polypropylene Plastic Gym Floor Tiles
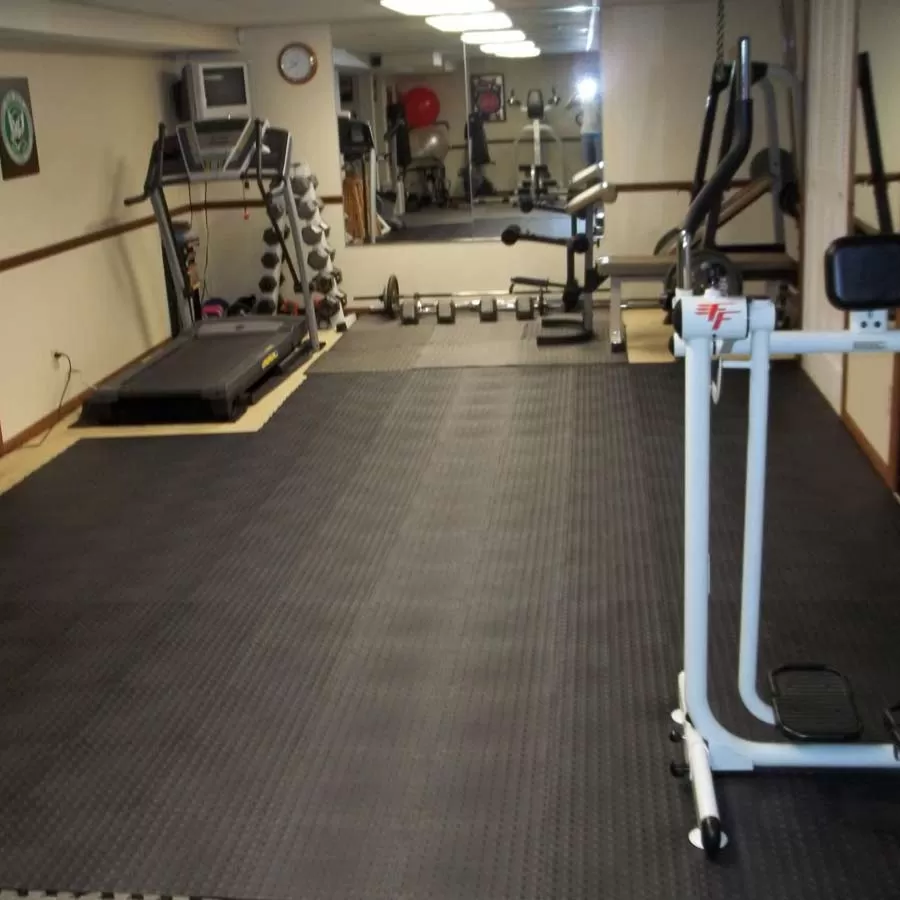
Snap-together gym flooring tiles almost always have a raised base and are the best interlocking gym floor tiles over carpet for home gyms. The support system on the underside of the tiles prevents the tiles from shifting on the carpet. These tiles are either made from PVC or polypropylene plastic. PVC serves as padded floor tiles for gym spaces at home. Polypropylene gym tiles are harder and often serve as multi-sports courts for basketball or volleyball.In either case, snap-together gym flooring tiles will almost always have loops or female connectors on two sides and pegs or male connectors on the other two sides, hidden under a straight edge.
Always start installation of this gym flooring in a corner with the loop sides facing out. Keeping the tiles facing in the same direction and again working out in a triangular fashion, push each new tile down until the pegs snap into the loops to connect the tiles. Since the tiles are raised, you may want to add ramped border strips to exposed edges. These connect in the same manner as the tiles.
Featured Product: Court Floor Tile Flat Top 5/8 Inch x 1x1 Ft.
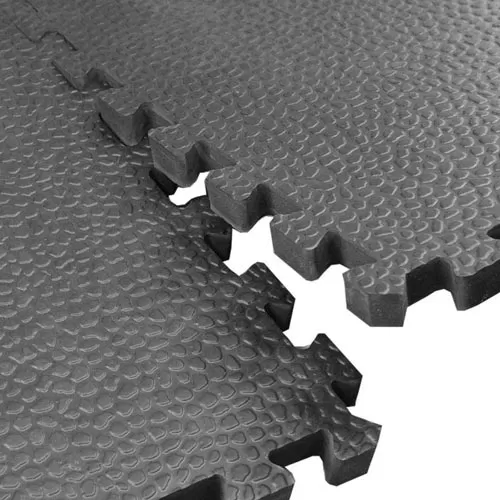
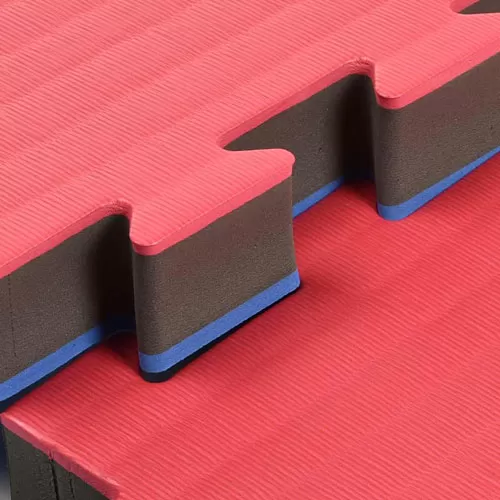
How to Install EVA Foam Padded Floor Tiles In A Gym
EVA gym floor tiles also follow the same procedure for installation as the rubber puzzle mats and are most often used for training that needs cushioning for your body, such as martial arts, gymnastics, or aerobic exercise. Some EVA gym flooring tiles, generally 2x2 feet in size, offer a universal interlocking system. Others, generally around 3.3x3.3 feet in size, will be directional, and you’ll need to look for that unique corner tab to figure out what direction to lay the tiles.In many cases, the thicker EVA gym tiles will be reversible and have a different color on the underside, allowing you to flip the tiles should you need to redesign or want a fresher-looking surface.
With these gym flooring tiles, some also come with border strips to give you that nice finished edge. Again, this is more common with the thicker tiles. Once you reach 1 inch thick, the tiles may even have the option of ramped border strips, which are most commonly sold separately.
Border strips most often come attached to the tiles at the time of purchase and use the same interlocking puzzle edge to connect.
Featured Product: Home Gym Flooring Tile Pebble 3/8 Inch x 2x2 Ft.
How to Install Gym Floor Carpet Tiles
If you’re going to install carpet tiles in your gym, you’ll want to make sure to have a rugged anti-static carpet tile with a bitumen backing. These tiles will have straight edges and need to be glued down. It is best to follow the manufacturer’s installation instructions to make sure you use the right kind of adhesive.Featured Products:
Dominator LP Gym Carpet Tiles 3/8 Inch x 19.69x19.69 Inches 20 per Carton
Fit Weave Heavy Duty Gym Carpet Tiles 3/8 Inch x 19-11/16x19-11/16 Inches Carton of 20
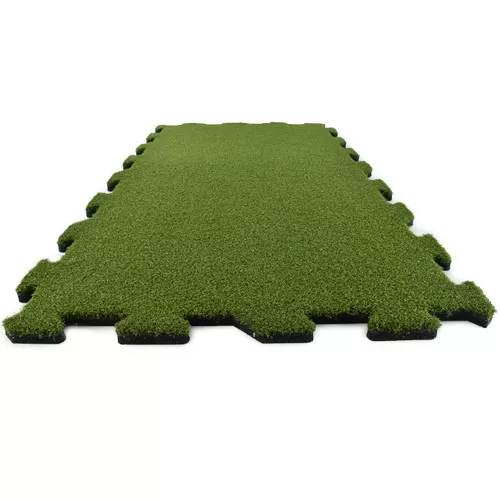
How to Install Artificial Turf Gym Floor Tiles
If you want a padded gym tile surface that you can use for sled work or footwork drills, you’ll want interlocking turf gym tiles with a rubber base. These tiles are also puzzle tiles and follow the same procedure as the previously mentioned puzzle-style interlocking gym flooring tiles. They can be either dry-laid or taped down.Featured Products:
Interlocking -
RageTurf Rally Interlocking Tile 24 mm x 23x46 Inches
Quad Blok -
RageTurf UltraTile 1 Inch x 24x24 Inches with Quad Blok
RageTurf dBTile 2.5 Inch x 24x24 Inches with Quad Blok
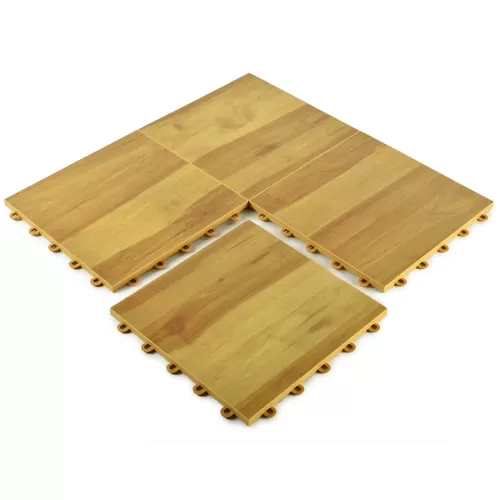
How to Install Vinyl Gym Floor Tiles
Vinyl gym floor tiles generally feature a raised polypropylene base and snap together. Follow the same installation procedure as the snap-together plastic gym flooring tiles outlined above.Featured Products:
VersaCourt Pro Wood Grain Court Tile 1/2 Inch x 12x12 Inches
Max Tile Raised Floor Tile 5/8 Inch x 1x1 Ft.
How to Install Rubber Gym Floor Tiles with Quad Blok
These interlocking tiles can be installed with a Quad Blok or full glue-down installation. With the Quad Blok installation method, the adhesive is applied to the Quad Blok, and the tiles are then connected to the Blok. The adhesive isn’t applied to the subfloor, essentially creating a floating floor installation.Featured Product: UltraTile Rubber Weight Floor Black 1 Inch x 2x2 Ft. with Quad Blok
How to Install Rubber Hidden Edge Tiles
With an interlocking edge design, these sport rubber tiles fit together tightly. As an added benefit, the interlocking sections are hidden underneath the surface of the tiles, meaning you never see them. All you see is a series of clean lines in the layout.Featured Product: Sterling Athletic Rubber Tile Gray 1.25 Inch x 2x2 Ft.
How to Install Cork Rubber Interlocking Tiles
This type of product can be dry laid similarly to interlocking rubber tiles. Each interlocking cork rubber tile measures 3 by 3 feet, which means you can complete the installation of your rubber cork blend flooring quickly compared to 2x2 foot rubber tiles that are meant for home gym installations.Featured Product: FlexeCork Interlocking Cork Rubber Tile 1/4 Inch x 3x3 Ft.