How To Use Greatmats Floor Plan Designer Instructional Video
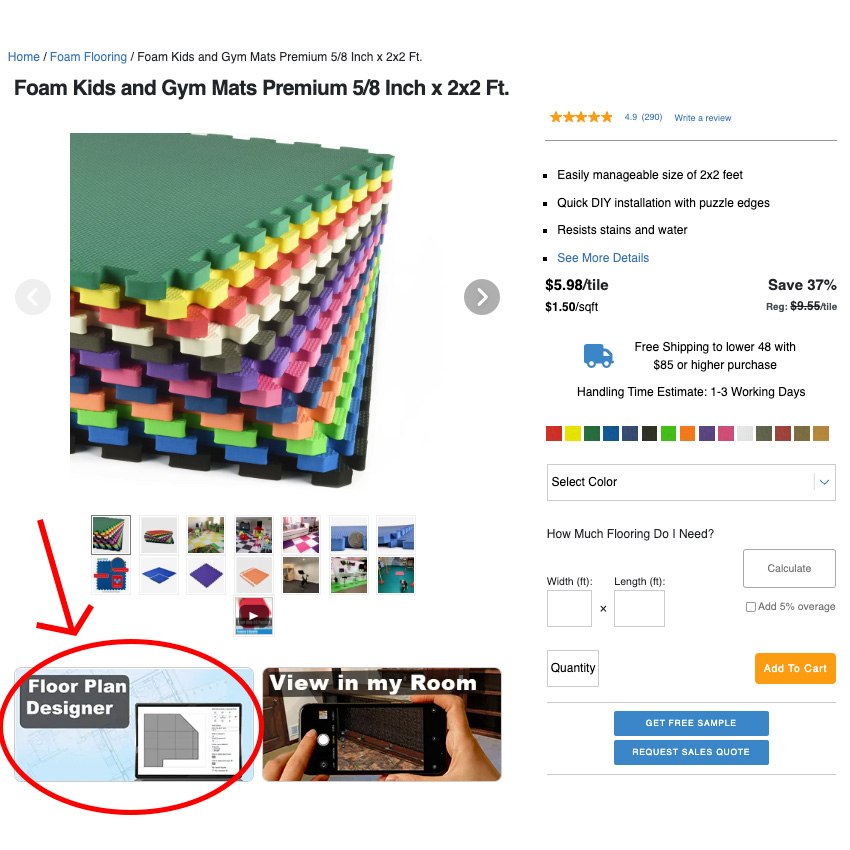
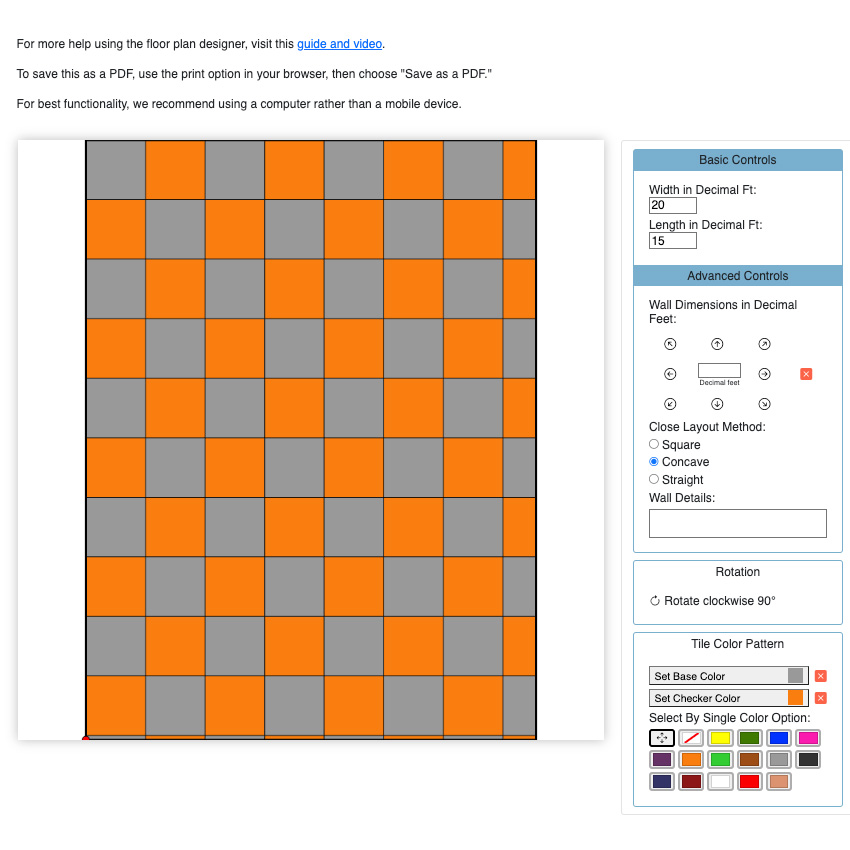
To start the floor plan designer, first, migrate to the product page that you would like to create a layout for and then click on ''Floor Plan Designer''. This will load the application. You can read the instructions on this page. Use the Basic or Advanced Controls to enter your room measurements in decimal feet. Continue until you have outlined the shape and size of your room.
You can choose a second color to create a checkerboard pattern, and you can also move the grid around.
Once your colors are selected and your grid is in place, the color(s) and quantities you need will be displayed underneath your design.
To print your design, go to File, then Print.
To save a digital file of your design, take a screenshot or screen capture to save your design as an image. You can also create a PDF. To create a PDF, go to File, select Print, then choose Print or Save as PDF.
If you want a quote, please email your screenshot image or PDF to info@greatmats.com.
Please note: colors may not be accurate and can differ with different monitors and settings. Please see photos on the product page for more accurate colors or request a free sample.
Call for assistance at 877-822-6622.

